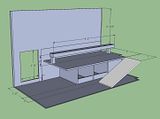
run construction advice please :)

miless2111s

New member
Joined
Feb 23, 2014
Messages
25
Reaction score
0
HI

We are starting the ground work for our first chicken run and coop (along with all the other jobs required to actually allow this such as re-locting the blow up greenhouse etc etc! :) ) As such this is the first of many posts from me asking for advice or bouncing ideas off you all! (I promise I will use the search button first though).

I am currently planning to sit the frame of the run on a sunken brick/block wall around 1'-2' deep (with 1 or two courses of bricks on top) so the fox can't dig down and the frame isn't in contact with the soil. This gives me the opportunity should I want to to raise the level of the actual run up a few inches (though this isn't great from the POV of my height at 6'3" :)) The run will be 5-6' at the front and 6'7' at the back wall. The covering will be Onduline or similar - in green across the whole run. The run dimensions are 6' x 11' and it is sited in the corner of the garden protected by the 7' wall to the left and the neighbour's garage wall to the back.

The coop will be raised off the floor and supported by the posts of the run. My first thoughts are for a 2' gap under the coop - does this seem sensible?

The big question for tonight though is the make up of the actual run. Obviously I don't want just mud so I have the opportunity to go as deep as I want in terms of making a well drained sub base. My first thoughts are a foot or so of crushed hardcore vibrated down into a solid but well draining sub base, topped of with some sand and a membrane. This will ensure that the whole thing is well drained (we're on chalk mainly). Then I am tempted to put down more sand or possibly Aubiose (picked up from my searches on here).
* How much crushed hardcore depth do I need or is this overkill?
* Do I need membrane? or does anything that grows through just get weeded by the girls? (or is there another reason for the membrane?)
* How deep does the wall need to go to stop the fox?

Thanks
 
Hi Miles, what an interesting project you're embarking on. I'm sure lots of people will chip in with ideas but here are just a few things from my own experience of a covered run on chalk subsoil.
The little wall will be an excellent base, for the security reasons you mention. We had to build a similar wall round three sides for our run, to level the area on a slope, but we did set the uprights in the ground, in 15" of concrete at the inner angles of the walls, with a frame at the top made from 2" square timbers, to make a really strong structure. If you didn't do this I'm not sure how you would secure the uprights to the base, bearing in mind that there is quite a lot of stress and weight from the mesh and the Onduline roof. We used 3" square upright posts, 8 ft long, so we ended up with a basic 6 ft of headroom. Remember you then need to allow for about 4-6 inches of Aubiose or whatever you plan to use, which sets the floor level higher. As you are tall, I would definitely advise making the roof as high as possible, all over the area if you can plan it that way, its so much more comfortable in the years ahead if you don't need to stoop or bang your head.
We used 1/2 weldmesh for the sides, and initially for the top as well, because unlike you I wasn't sensible enough to plan for a covered run from the start. We also put down a layer of weldmesh all over the floor, and wired this on to the sides to make a sort of mesh box. Even if a predator did try digging in, it would be unlikely to get anywhere once it met the mesh. The small size of the mesh completely excludes wild birds and small rodents as well, which I think helps a lot with preventing redmite and other parasitic infestations. Certainly I've had no redmite problems in several years.
On top of the floor mesh we laid permeable landscaping membrane, well pegged down at the sides. If you can measure this up and hem any cut edges on a sewing machine before installation, it will prevent fraying, otherwise allow for a generous turn under on the cut edges, and use wide fabric, at least 2 metres wide, so you have fewer joins. Mine has now been down for several years and is still in good condition. With Aubiose on top it doesn't get worn. Then on top of this you can put your bedding. I've tried several but in my opinion Aubiose is the best of the lot. Highly absorbent, drains easily, and doesn't seem to go mouldy even when wet, like wood chippings do. Its very easy to poo pick daily and stays fresh for a long time. Its soft and warm under the girls feet and they like sitting on it. I use it in the coop and nestboxes as well. The reason for using a membrane is that it stops the hens scratching up earth into the bedding, so it stays clean apart from their droppings, which can be poo picked. If there's no membrane and they scratch mud up into the bedding it can get nasty quite fast.
If you have a covered run, on a well drained base, you won't have drainage problems. I don't think you will need to do anything more to the
base than just levelling it and walking around on it to compact it. People in low-lying areas prone to flooding have big problems, but we chalk dwellers are OK if we can keep the run dry with a good roof and guttering. You may want to design panels for the sides to prevent rain blowing in sideways during the winter. I use clear plastic tarpaulin for this, and I remove it when the summer comes, but it does keep the floor dry in winter and provides protection from the wind, which hens hate. Again, it's very tough, cheap, and lasts for years if secured by wooden battens to the uprights of the run.

You don't say how many birds you intend to get. Your 6 ft by 11 ft run will provide 66 sq. feet, 9 sq. yards or perhaps 8.5 square metres. The recommended minimum run area per bird is 2 sq. metres, (more is better) so you could reckon on a maximum of 4 medium- sized hens. Or you could start with three, and then, when eventually one died, you would have room to replace her with a pair of new ones, as it's very difficult to introduce a single bird to an established group. You could usefully extend the useable space by making a space under the coop at least 8-12 ins high, more is better as it will mean less far to stoop when collecting eggs and doing the daily internal poo picking. The hens will enjoy getting under the coop and will probably like a dustbath under there if there is enough height.
That's enough from me! We will look forward to hearing how you get on. You didn't say what sort of coop you intend to get, or make - we all love mulling over coop design on here as well!
 
Thanks for both the welcome and all the information. I don't know why but we thought that we could have up to 8 birds when we were planning the space last year...odd. The plan is for 4 birds (1 each) so at least we have space for that. Edited to add: my wife has reminded me that when we were making these calculations the (US possibly) sites seemed to include the coop floor space in the "total run" space so maybe that is one area of discrepancy but not enough to account for the magnitude of variance. Do you include run+coop or jus coop in the 2 square meters?

I will be making the coop - the current plan is for one end of the run to be the coop (set 2' off the ground) so will be 3'x6' with the human access being from within the run given the space constraints. Now that we're limited to 4 birds max I guess this coop might be too big? How tall does the internal space within the coop need to be? Just checking that I'll have the headroom for the space underneath.

Can I cheat extra space by making things multi level? But I guess this will not give enough room to give sufficient space for more birds...I could extend the run down a 3' space between the wall and the trampoline but that could look odd.

Good news that I don't need to mess about with compacted hardcore etc. That's a lot less earth to remove and cost.

How deep do I need to make the wall to prevent burrowing?

I'll post up some sketchup models I will be producing of the run and coop when I've made them so that you can all critique and help me improve them. I've already considered materials/design ideas which include:
* will be marine ply screwed and clued on three sides with access only from the long side inside the run.
* all joints and internal edges to be smoothed with an epoxy bead
* plastidip paint to be used on all internal surfaces to further reduce the mite hiding places & make the thing waterproof for the seasonal wash with a hose (details).
* Internal nest trays accessed by a hinged panel which will also act as a surface to pull them onto. This panel then folds all the way down to give better access to the inside for cleaning.
* some sort of hinge to allow the front to be opened to allow daily poo pick etc
* poop trays under the roosts
* possibly a slopped floor to funnel water to one place for the seasonal hose down.
* basically everything along the front wall (closest to the run) so that poop picking, egg collection etc is all happening at the front. The rear space will be for access to the roosts for the birds - a ramp I guess?
* I don't know about windows - I don't think they'll want to roost in front of one so not sure what to do about that + if one is even needed.
* Ventilation across the top of the coop
* Water nipples for drinking water

My concern at the moment is making sure that I have the right layout for the run before I dig! :)
 
Of course many people do keep poultry at higher concentrations of space than 2 sq. metres per bird, but for people who want to keep a trouble- free domestic flock, adequate space is essential. If you overcrowd your birds they are very likely to get stressed, start pecking each other, which can even lead to fatal njuries once blood is shed and the others all pile in, besides a drop in egg production. So I would say give them as much space as possible, especially when you are starting out with your first birds. If they have enough room they will live happily and healthily together for years with no problems. Many cheap coops with runs attached are sold with the claim that they are big enough for quite impossible numbers of birds, and then people join a poultry forum and find out that the equipment they've bought online is totally unsuitable for the number they hope to keep. You can and should provide extra perches within the run, especially where the girls can see out of the sides, about 15 ins off the ground. My ladies spend a lot of time perching in a row on theirs, looking to see what's going on in the garden, and this in effect increases their range. Also a bird who is getting bullied can get away better.
I would avoid sealing the ply with plastisol paint, especially on the inside, as the ply needs to breathe and if you seal it inside you will probably get condensation problems. The traditional stuff for treating wooden chicken coops of course is creosote, but its now hard to obtain the proper strong stuff unless you are a farmer in need of a huge drum. In any case its horrible stuff, very toxic and takes ages to dry. As your coop isn't going to get wet, you could just use a breathable preservative for outdoor buildings. Ventilation is of prime importance in the coop – there's a long thread somewhere called Condensation in Coops, where a year or so ago we thrashed out the whole problem of avoiding condensation and also the disease transmission which can result from stuffy coops. See http://poultrykeeperforum.com/viewtopic.php?f=3&t=5388&hilit=Condensation+in+coops
Personally I'm a big fan of plastic coops, especially the Green Frog ones. A Medium green frog would be fine for up to Six medium hybrid- sized hens and possibly compare reasonably well in the long run with the cost of making your own.
No windows needed, they like it nice and dark inside to lay their eggs and go to roost.
It will be better to clean up the coop more often than once a year. You can get some Poultry Shield, which is a disinfectant safe for poultry but effective against poultry viruses etc, dilute it in water and use it to scrub the surfaces of the coop and the perches etc. and this should ideally be done fairly often. With my plastic Green Frog I can just wipe the inside dry and have the job done in 15-20 minutes, ready for the hens to go into a dry clean bedroom. Using a hose is rather messy, will soak your lovely Aubiose on the floor, and the girls won't like it. A bucket of hot water, a scrubbing brush and a few old towels will do the job, provided you have kept up the poo picking. A good layer of Aubiose on the coop floor will enable you to remove the overnight poo very quickly and easily, and will absorb any moisture so the inside doesn't need built- in drainage. Or you can line the floor with newspaper and just make a daily parcel of the solid sheets for the compost heap.
You don't need to put any water drinkers or feeders actually in the coop. Personally I've never used water nipples, I like to see my girls getting a good beak full from a drinker, tipping their heads back and having a proper drink. I set the drinker up high on a concrete block, at the height of the smallest hens chest, and this helps prevent mess being scratched up into the water. I do this for the feeder as well.
 
Please don't mistake the slight hint of desperation/disappointment about the numbers to mean that I'm going to pack 'em in regardless - that's what asking for advice is all about- asking, listening and taking it :) The welfare of the birds is primary here :) I'm just going to see if there is anyway to increase the size of the run so that we have some headroom when the time comes when the birds stop producing eggs and we want to augment the flock. It's that or accept a period of no / low eggs or an early end for them :(

I'm slightly confused by the advice on the ply though. I know wood generally needs to breath, especially as this will form part of the external element of the run so it needs to either be 100% waterproof or able to equalise with the environment however this is ply so this is less of an issue. Structurally I know that 100% proof isn't an issue (I made a shower screen from marine ply sealed with epoxy and that's going fine). I'll have to think on this a little more. How is having a plastic coated internal surface for the coop any different to having a plastic coop in terms of condensation?

Good call on the hose. I was using "seasonal" as I remembered reading somewhere that a deep clean was required at least twice a year but I wasn't sure of the exact frequency so was staying non committal until I've looked it up again :) How often in "fairly often" for you? Weekly, Monthly,Quaterly ...?

Thanks for all the info and advice - it is really appreciated :)

Miles
 
Yes, that's a valid point about condensation in plastic coops. You're quite right that it will occur - IF ventilation is inadequate. When you read through the thread I highlighted, you'll find this issue discussed at some length. Personally, because I have a lovely secure run, like you will end up with, I NEVER shut the pophole and also I leave most or all of the ventilators open. In Green Frog coops these are a good design. Not only does this ensure plenty of air, but it means I don't have to go down in the early morning to let the girls out, or again after dusk to shut the pophole. A whole lot of hassle avoided there, and it makes it easier for my friend to look after them when we are away as well. Chickens in the wild roost in draughty trees where the rain just tips down on them, so as long as your coop is waterproof it doesn't need to be shut up tight. Chickens are exceptionally well insulated and do not need to be 'kept warm!'
 
I really like this lady chicken run,she keeps Brahma's.Have a peak at her profile on FB https://www.facebook.com/MyChickenRun?ref=profile
In her albums there is a lot detailed pictures of it so it give you many ideas.She also uses hemp core as the bedding.
Welcome to the Forum :-)99
 
Marigold
I've just read the condensation thread and the main conclusions seem to be
* more ventilation is good
* try to more or less equalise the external and internal temps
* no need to heat the chickens up - they're walking duvets
* Aubios seems to help absorb some of the moisture without being materially effected (i.e. it doesn't loose the fluffiness etc)

What the thread didn't could (and could have been expected to really given it was empirical rather than scientific) was give any guidance on how much ventilation is "enough". From the notes I took when researching coop design a year ago (sources unknown but focused on US resources) I found a figure of 1 square foot per bird which sounds like quite a lot! However looking at my design I will have an area to put ventilation into of around 5.4 square foot (due to the sloping roof) so given that holes etc will take wound half that I am not far off the square footage (and that is without any additional vents in the roof and without taking into account the wavy profile of the roofing material.

What sort of measurement have you all found to work? Or should I resurrect that ventilation thread to keep the thoughts together? (not sure of the forum etiquette here :) )

Miles
 
tygrysek75 said:
I really like this lady chicken run,she keeps Brahma's.Have a peak at her profile on FB https://www.facebook.com/MyChickenRun?ref=profile
In her albums there is a lot detailed pictures of it so it give you many ideas.She also uses hemp core as the bedding.
Welcome to the Forum :-)99
Wow! That's one heck of a set up she's got there! :) Mine will be nothing like as big or smart but it's something to take ideas from :)
Thanks
Miles
 
When deciding coop size,you need to consider what length of perches the birds need, and also how much space there will be in front of each perch and behind it. Each medium- sized hen will need 10-12 inches of perch space, so perches need to be designed in units of these measurements. Larger birds, such as Orpingtons or Brahmas, will need more room, but these heavy breeds often prefer not to perch at all, in which case they need adequate floor space to sit on at night, (and also double-sized nestboxes.)
If you visualise a chicken on a perch, you'll see that the space behind has to allow for the back of the chickens body and for the tail feathers, which can be quite long in some breeds such as Leghorns, or very long for cockerels. The birds on the back perch, facing forwards, need enough room so they don't have their beaks up against the bum feathers of the bird on the perch in front, and also need enough space behind so they don't poo all down the wall or door behind them. So the distance between the front and back perches needs to be sufficient for the front of the birds on the back perch and also the back of the birds on the front perch. The perch at the front, nearest the pophole, needs to allow for the front ends of the birds using it, and additionally to be set back about 6-12 inches extra, to allow room for the hens to get in and out of the coop easily. I would think that you could fit two perches in to a coop which was 4ft. from front to back. If the coop was 3ft wide, there would be room for up to 6 hens in 2 rows of three. If in doubt, as with everything else to do with chicken housing, bigger is better.
All the perches need to be the same height, or there will be competition for the highest ones, and made of wood or plastic, 2"" or 2.5" section, with the edges rounded off. They need to be removeable for scrubbing, and so you can inspect the fixings for redmite. Redmite love to hide away in little nooks and crannies like perch ends, so they can conveniently crawl out at night and eat your girls.
Nestboxes need to be positioned lower than perches, as this will help them to resist the temptation to sleep in them.
Onduline roofing is excellent for ventilation, and also avoids the problem of redmite colonising the space between a ply roof and its felt covering. You can cut out holes or slits in the top edges of the coop sides as well, and some people cover these with weldmesh to prevent predators entering. Some people fix hinged flaps which can be closed when the prevailing wind is very strong on one side or the other of the coop. As I said, I never shut he pophole, but I do have the coop positioned so that the pophole faces into a corner where two sides are covered in with tarpaulin, so it's shielded from direct wind or blowing rain.
 
I will attempt to post up a picture of the interior that I have planned - it basically focuses on bringing everything that we need to touch on a daily basis to the front of the 6' side. It has a poop shelf (US term which I love) under the perch and the nest boxes will slide out. Access will be via an opening flap in the 6' side


Good grief it worked!

Looking at the drawing I will need to arrange for the top to hinge up easily to allow simple cleaning but that shouldn't be too hard with a pulley or similar in the roof. Maybe gas rams from a van door??

Anyway back to the interior... The perch is situated centrally on the 2' wide poop shelf and runs for just over 4' which should give enough room for the 4 birds. I haven't positioned the nest boxes right by the entrance as I thought they'd need some circulation space however a consequence of this is the ramp overlaps the front of one of the nest boxes (there is a 6' gap though). I could reduce this by moving the boxes closer to the door but how close can I safely go??

The nest boxes are 18" deep at the moment as I am allowing for the possibility of fitting a "roll away" style box to guard against any egg eating and to keep the eggs nice and clean. I need to do a little more research into this before committing to the design but I'm leaving 6" free space for this.

The ramp drops 1' in 2' - is this too steep or too shallow? (again steeper would obviously help with the nest box conflict.

The space to the right of the nest boxes is for tools and supplies and is only accessible when the flap is down at the moment.

I may dispense with the little notch in the walls (which fit around the run support posts) as this looks like it will just add complexity whilst only really giving 3" of extra room which isn't really needed...

Ventilation will be the triangle above the coop between the top wall of the coop and the sloping roof - 1' at one end sloping down to meet the other end of the coop. This will be screened by wire mesh and may feature a sliding panel type of regulator to maximise the amount of ventilation. TBD.

The minimum space above the perch is just over 2' as my research suggested this was the recommendation. Obviously at the other end there is 3' headroom.

Any suggestions for improvements gratefully received :)

Miles
 
Hi Miles

Just seen this thread, it looks as if your making things a bit more complicated than you need to with this design in my opinion. In effect a simple rectangular box built around 4 2 x 2 legs with the sides cut to allow a sloping roof and whose front opens on a hinge with opening nest boxes added to the side is all that you need, takes a day to build and costs around £50, and lasts as long as you are prepared to continue to coat it with creocote or similar. Will try and get some photos of my run and houses, (with dimensions) up tomorrow if it would help you at all.
 
dinosaw said:
Hi Miles

Just seen this thread, it looks as if your making things a bit more complicated than you need to with this design in my opinion. In effect a simple rectangular box built around 4 2 x 2 legs with the sides cut to allow a sloping roof and whose front opens on a hinge with opening nest boxes added to the side is all that you need, takes a day to build and costs around £50, and lasts as long as you are prepared to continue to coat it with creocote or similar. Will try and get some photos of my run and houses, (with dimensions) up tomorrow if it would help you at all.

Yes - the hinged front is certainly growing on me - I've stuck a person into the CAD and the flaps idea isn't a winner. I wouldn't want a 6' door though so I'll split the front in two and have two 3' doors - easier to manage in the run and easier for the hinges to deal with.

The nest boxes to the side isn't going to work unfortunately due to the location of the shed. I'm certainly interested in your run and house :)

At it's heart the current layout is fairly simple (box, ramp, shelf, perch, doors) - it's all the questions and checking that I'm doing as I think my way into this which adds to the complexity. To some extent I've got time to hone this (given I haven't dug the foundations yet) and I need to know that I'm not committing mistakes as I don't really have time to correct mistakes after the build completes due to all the other jobs on my to do list! :)

Regards

Miles
 
Well my 8 bird house is less than 6' wide including side nest boxes because I use a double perch configuration which makes it approximately 16 inches deeper than if it was a single perch but at least 3 ft narrower. Off the top of my head your 4 bird house would be approx 3'6" wide x 3' deep if you went double perch. If you did continue with the single perch idea and drop the idea of the droppings tray you should only need a single door of around 3ft, easily large enough for you to lean in and scoop out, the trays are a good idea in theory but having seen them in practice the saving in time, effort and mess is negligible really.
 
dinosaw said:
Well my 8 bird house is less than 6' wide including side nest boxes because I use a double perch configuration which makes it approximately 16 inches deeper than if it was a single perch but at least 3 ft narrower. Off the top of my head your 4 bird house would be approx 3'6" wide x 3' deep if you went double perch. If you did continue with the single perch idea and drop the idea of the droppings tray you should only need a single door of around 3ft, easily large enough for you to lean in and scoop out, the trays are a good idea in theory but having seen them in practice the saving in time, effort and mess is negligible really.

Well I'm certainly interested in your pictures and measurements now :) Especially the double perch, how they get up to them (I'm assuming here that we have to provide a non flying path!) and the relationship with the entrance.
Interesting observation about the trays - the US sites seem to view them as almost as good as sliced bread so it's good to have an alternative view. In the current design the tray has additional benefits around shading and protecting the nest boxes and doesn't add / take away much in terms of complexity but I can see how it wouldn't work in a double perch situation (I think!).
Thanks
Miles
 
I just put a 3" layer of Aubiose under the perches and next morning I scoop out the dirty stuff and either redistribute or top up the rest. If you have poo trays they provide a dark and cosy surface for redmite to hide under. As Dinosaw says, the simpler the design the better, so long as the internal measurements are OK and you can easily reach all parts of the coop when the doors are opened.
Which edge will be the hinge? Avoid having this at the top, of course, as with a top hung door you would probably get dirty hair when reaching inside.
 
Here are some photos of my 8 bird coop, its an ugly brute but it keeps my birds warm, dry and safe and they thoughtfully decided to appear in the photos to lend a sense of scale. Dimensions are as follows 4' 5" wide 2' 11" deep, max height 3' 8" internal height 2'1". The coop is raised 15 inches off the floor which is plenty. Nest box dimensions are 16" deep 13" wide max height 10.5" tapering down to 9". What I meant by a double perch layout was two sets in parellel as per photo 2 which is far more effective with regards to space, so I have two 31" perches seperated by about 12". 8 inches of perch per bird is a good rule of thumb, any more is wasted as they huddle up together and you just get an unused gap at the perch end. If I was to translate this design to a four bird coop, the height and depth would remain the same but the width would shrink to around 3' 2" wide, so your coop would be 38w x 35d x 44h inches. Obviously you have to find your own way in what you want to do and i can understand the excitement in designing something new, but you will find that pretty much all small coop designs whether it be plastics like green frog and solway or woods like flyte so fancy etc are some sort of a variation on this, namely a squareish box raised off the ground on legs with nestboxes to the side or back which open via a flap and there is a good reason for this, it is simple and it works.
 

Attachments

  • house4.JPG
    house4.JPG
    63.1 KB · Views: 2,895
  • house3.JPG
    house3.JPG
    51.4 KB · Views: 2,895
  • house2.JPG
    house2.JPG
    50.2 KB · Views: 2,895
  • hose1.JPG
    hose1.JPG
    63.6 KB · Views: 2,895
In case this helps - I'm a non- DIY female relying on outside help from a non- DIY hubby !!! between us (& a handyman who does know DIY!) we constructed a large run & coup still standing after approx. 7 yrs (can't actually remember how long!) There is a picture of it somewhere on here, its blue!!

House was made from a tool shed (old but never used still in its flat pack) the sort with lap wooden sides & door, which we cut down in height & added an onduline roof. We added an 'extension' a couple of years later for more chooks, made from marine ply 'tacked on the back' in appearance, & an external nest box with sloping roof, again cut into one side. This all sounds a bit Heath Robinson & although wouldn't win any awards for architecture it has stood up to snow, hail & all this rain for this length if time! It does need replacing now really which we will do when we move house later this year (a good opportunity!) it stands on 4" x 4" posts off the ground about 2'. Chicken wire sides & top although next time will be weld mesh, at the time had to make savings ! As my hubby is also over 6' its angled to a point in the centre (like a shed would be) so he can stand full height, I really would recommend this for you too.

The ground is the problem as we also have clayish soil & it does get very soggy but one end of the run is covered with a tarpaulin so they have a good area dry at all times. I have 2 sides solid walls (garage & fence) with one end tarpaulin (removable in summer) & one side open. One useful thing is a 2'6" x 6' moveable screen which protects against slanting rain, snow etc. which I just stand propped up on the ground. Nothing fancy!

When I started out on this chicken keeping lark I couldn't find any sites like this & I had to make it up as I went along! My main tips would be make life as easy for yourself as possible so it doesn't take long to maintain if you're short of time some days, & if someone else has to look after them during holidays, also don't take short cuts on security - use bolts large & easy to draw even when your hands are cold in winter, you need to outfox the fox!
Have fun, its a wonderful hobby, I love it! :-)99
 
Dino

Belated thanks for the post - one thing that surprised me was the relative lack of difference between the nest box height and the perch height! When I found out that the perch should be higher than the box I was imagining a lot higher than your picture showed me. Just goes to show how silly assumption can make you!

You are right that the box is a "brute" but it works so that's something to really think on, not least as I am about to actually start building! Now I need to balance my natural "pretty pretty" instincts agains that is needed and quick to make. Hopefully I'll manage to settle in a happy place :) One thing about your coop compared to some of the uber pretty ones on US sites is the poo staining - is this just because you have a higher tolerance for the natural state or is there something about the design that makes either cleaning harder or the crap more persistent? Or am I misreading the picture? :)

Marigold

Thanks of the warning on the poop tray - something that I hadn't considered. My interest in them was down to my mis-understanding that the perches needed to be above the nest boxes - hence if they're up "there" already then a shelf would make sense, however if the perch can be effectively on the floor then the shelf isn't needed.
Thanks

Miles
 
I think it's probably a combination of people cleaning their coops religiously before they photograph them or them not having been used at all and you perhaps misreading my pictures, the only poo staining in the coop is on the perches, which unless you are prepared to be cleaning them virtually every day (which trust me after a while you won't) will have poop on them for the majority of the time. Provided you put in a deep layer of bedding and clean it out at least once a month you won't get any staining to the bottom of your coop, you may get the odd spray to the back wall if you site the perch to close to it but my view is that a bit of muck now and then does them no harm. Obviously a material like plastic with a smoother surface will always be easier to clean than wood but I can't say I have ever had any problems cleaning wood. And yes perches only need to be a few inches higher than the nest boxes. Be sure to post up your photos of the coop when you complete it so we can see what you end up with, that coop took me a day to build, was taken apart when I moved abroad and given to the people who I gave my chickens to who then reassembled it and it is now giving them good service too.
 
Back
Top